

After getting your Cortex-M development board now its time for getting started with MCUXpresso IDE. In this Step by Step tutorial we will go through how to create projects in MCUXpresso IDE for Cortex-M series Microcontrollers by NXP(Founded by Philips) based on CMSIS (Cortex Microcontroller Software Interface Standard). MCUXpresso is a derivative of LPCXpresso and Kinetis Design Studio IDEs with combined support for LCP and Kinetis MCUs. The IDE comes with integrated arm-gcc compiler and all the necessary debug drivers like LPC-Link, etc.. to get started with rapid embedded systems application development using your Xpresso board. Both older and newer boards are supported.
This guide is applicable for NXP’s Cortex-M MCU families like LPC800(e.g. LPC81x), LPC1100(e.g. LPC111x), LPC1300(e.g. LPC134x), LPC1700(e.g. LPC176x), LPC4300, etc. After creating MCUXpresso projects with CMSIS, the IDE will automatically add all the necessary startup files(for initializing MCU), headers and a project source file(C/C++) depending on the settings we choose while creating project.
Where to download the IDE from? You can download and install the IDE from the links given below:
- MCUXpresso v10.0.2
- You can always check the latest version @ MCUXpresso Software and Tools for ARM® Cortex®-M cores
After download, install from the setup file using default settings. During installation it will also install debug probe drivers which is also used to flash the code. Just click Yes/Next/Accept if its asks for driver install confirmation. By default the IDE will install to location – C:\NXP\MCUXpressoIDE_<version>\. After install follow the steps below to create a new project. In this guide I have shown project creation using LPC1114/302 as target, as an example/demo. The steps will be same for other Cortex-M series MCUs like say LPC1769. I have provided workspace archives containing example projects for LPC812, LPC1114, LPC1343 and LPC1768/LPC1769. Download links are given towards the end of this tutorial.
Step by Step Tutorial
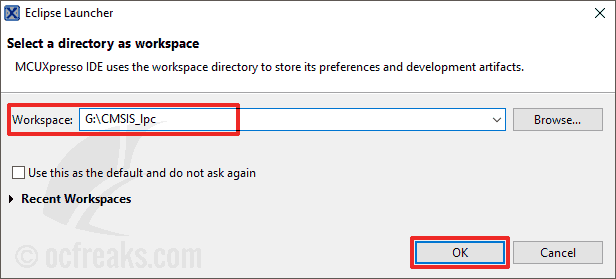
Step 1: When you start MCUXpresso, it will first ask for a path to create a workspace. A workspace is like a master directory with settings and can contain many individual projects, more like a general “Projects” folder. When prompted enter the path where you want to create your workspace:

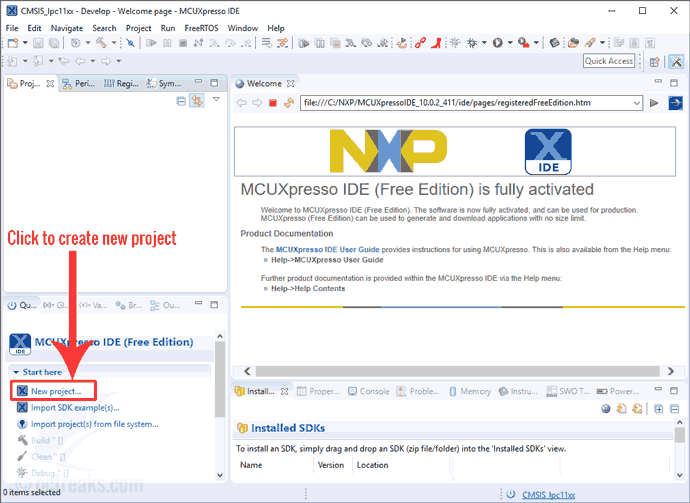
Step 2: Now, the IDE will launch as shown below. Now click the on “New project…” in the bottom right view of the IDE, under “Quickstart Panel” tab:

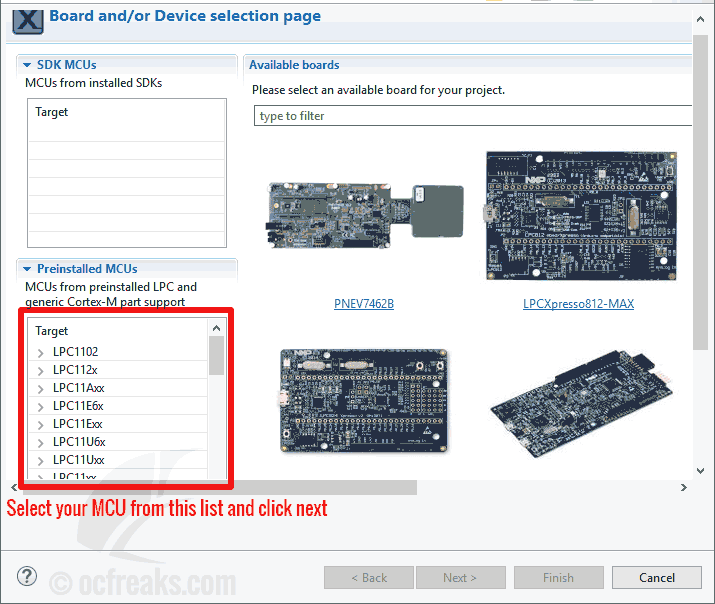
Step 3: A wizard to create a project will open. First we have to select the target MCU which we are using, from the MCU list which can be found under “Preinstalled MCUs” as shown below:

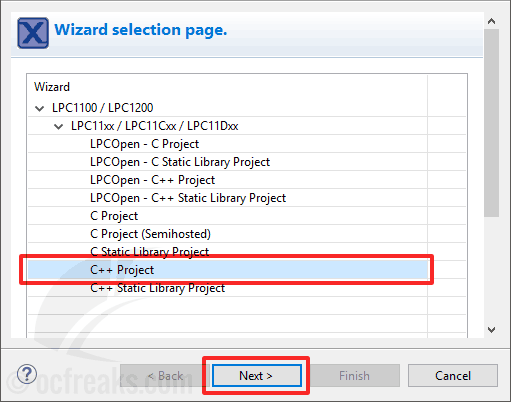
Step 4: Next select “C++ Project”:

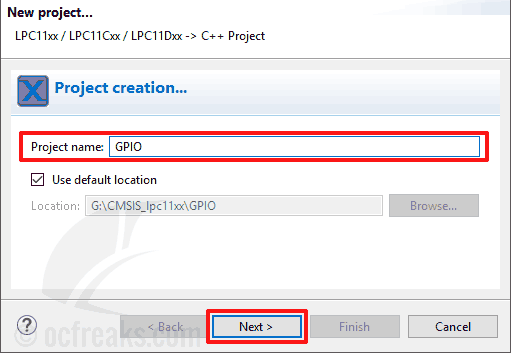
Step 5: Next enter a suitable name for your project. Make sure that the checkbox “Use default location” is selected. This will create the project directory inside the workspace directory. Then click “Next”:

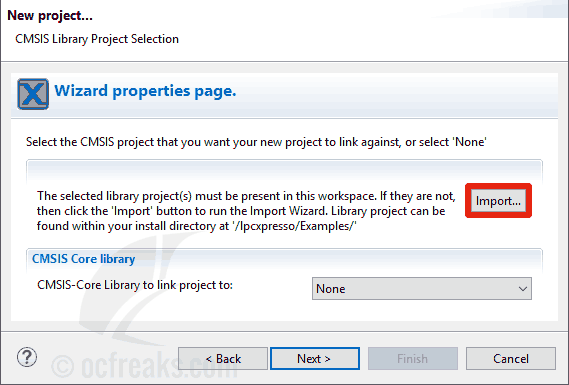
Step 6: Click on “Import” so we can import the CMSIS files for our MCU:

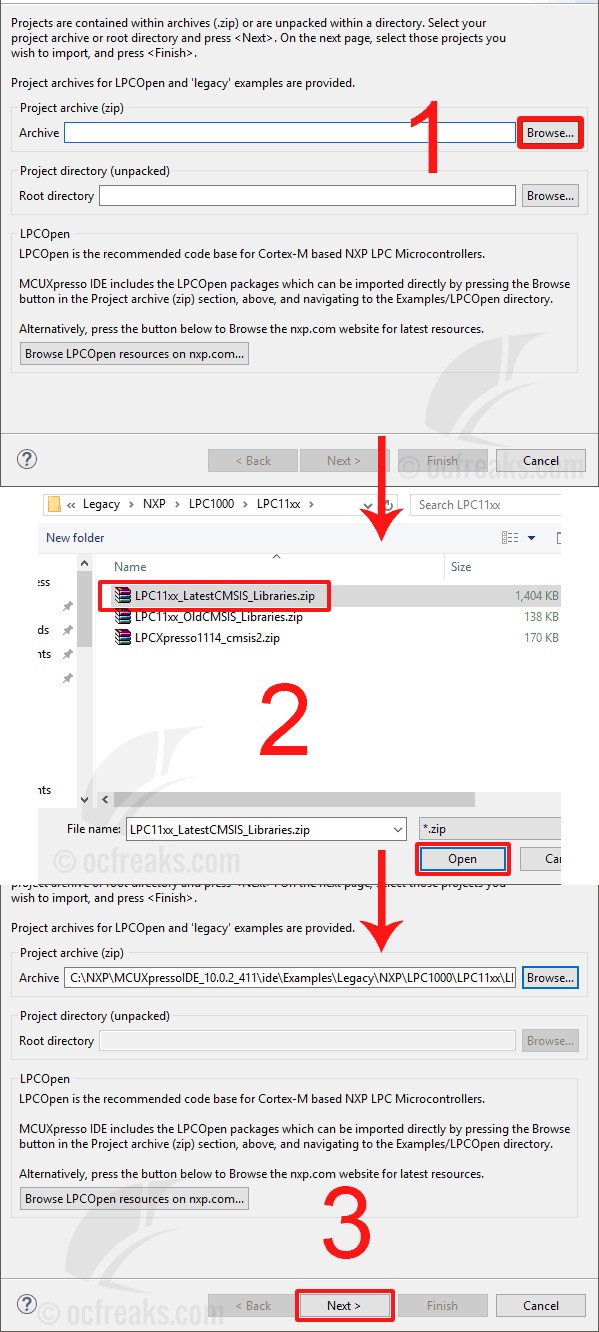
A new “Import…” window will appear. Click on “Browse” under “Project archive (zip)”. Then Select the required CMSIS library zip file for your MCU family. This can be found under “ide\Examples\Legacy\NXP\LPC1000”(for LPC1000 MCUs) inside the MCUXpresso installation directory and click “Next” as shown below:

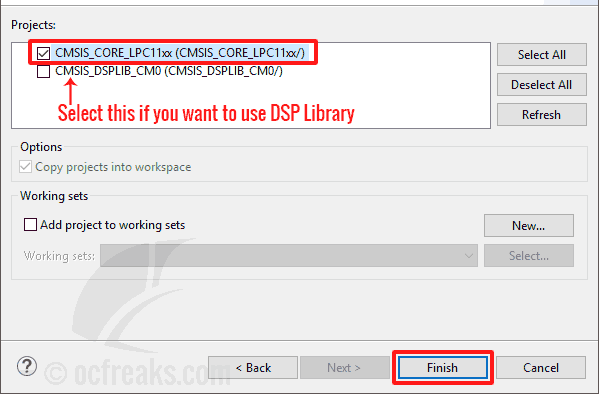
select the CMSIS_CORE project only if you won’t be using CMSIS_DSPLIB or you can select both Then click on “Finish” as shown below:

Step 7: Now under “CMSIS Core library” select CMSIS_CORE_LPCxxxx for your MCU family and click Next. In the next screen, do the same for CMSIS_DSP library if you had selected it in step 6. Or select “none” and click next.
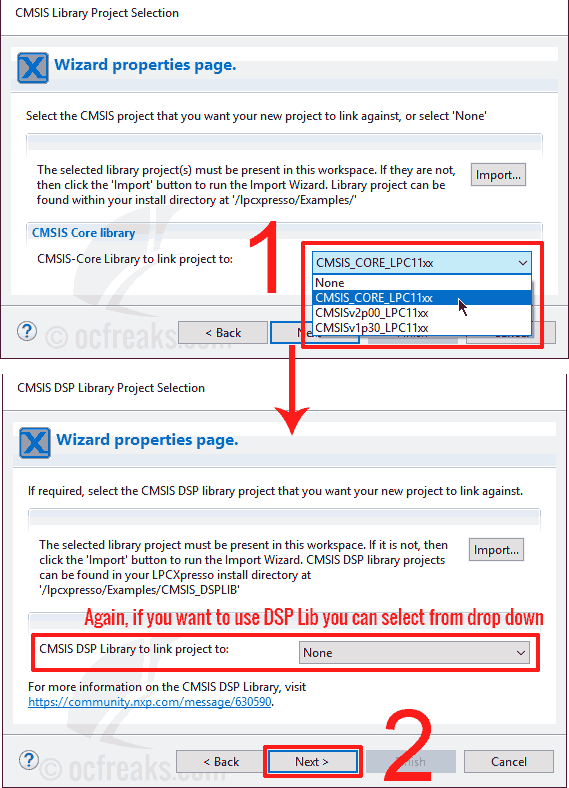

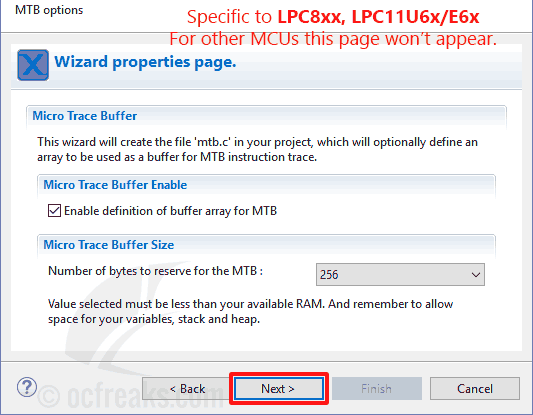
Extra options specific for LPC8xx & LPC11U6x/E6x Target MCUs (Ignore this for other MCUs). This option is used to enable or disable MTB (Micro Trace buffer) which provides a method to collect details about the instructions being executed. Even if you disable this, still a file named “mtb.c” will be created in your project which defines the array variable which is used as trace buffer – but the code will be not compiled since C/C++ Macro definitions will disable it. If you choose to enable it, you can change the buffer value any time in the IDE.

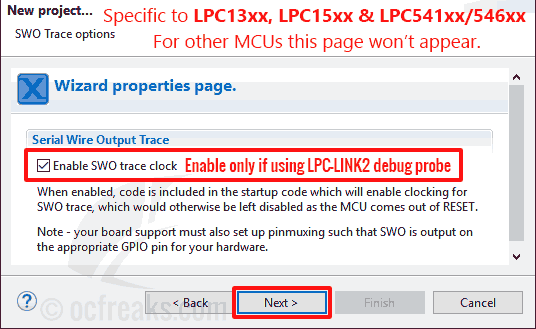
Extra options specific for LPC13xx, LPC15xx & LPC541xx/546xx Target MCUs (Ignore this for other MCUs). This will is used to enable or disable SWO (Serial Wire Output) Trace used for capturing events occurring on MCU in real time. This is only support by LPC-LINK2 debug probe. So, if your board has LPC-LINK1 probe or any other debug probe you will have to disable this option. You can read more @ MCUXpresso IDE SWO Trace Guide

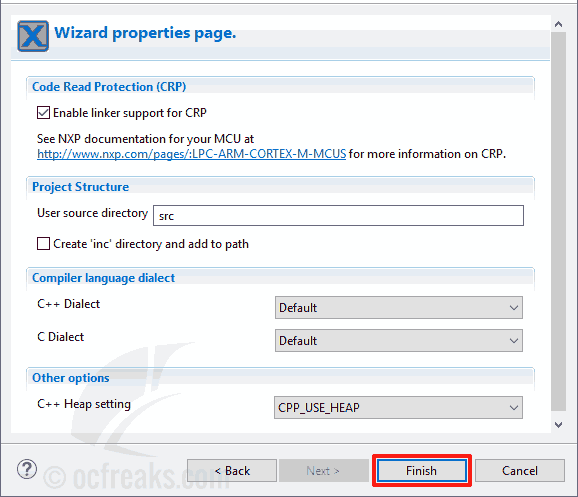
On the next options page click “Finish”:

Step 8: The IDE will now create a project with the settings we selected as shown below. The name of the source file containing the main() function will be <Project-Name>.cpp. When you are ready with your program you can click “Build” under “Quickstart Panel” to compile.
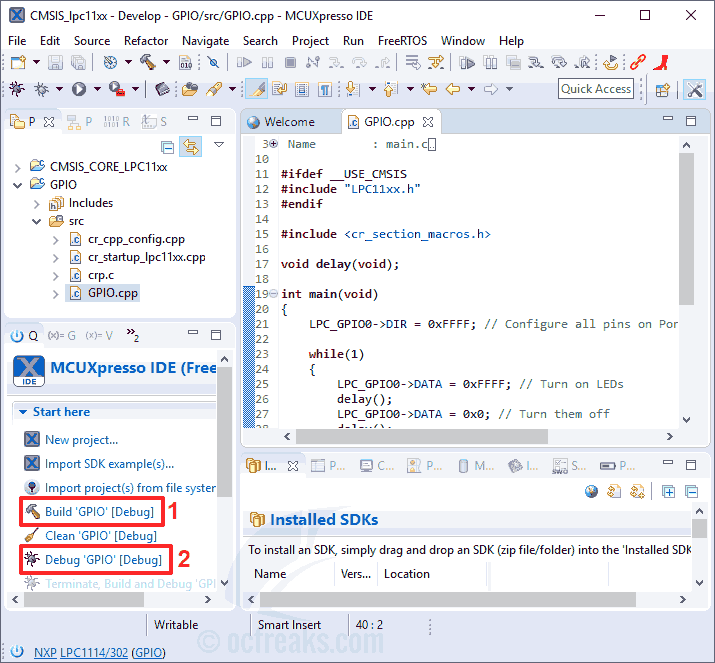

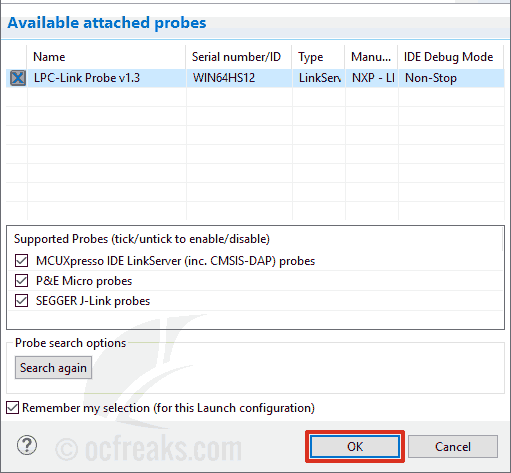
Finally, to start debugging(or Flashing compiled program) connect you Xpresso board to your computer and click on “Debug” under “Quickstart Panel”. This will start a debug session and a new pop-will appear to select your debugger(debug probe). It will automatically detect the debug probe. Just click “Next”:

Once the program is flashed on to the chip you can click on the resume(Green Triangular Play button) or F8 key to start debugging or code execution on the target MCU as shown below:


To stop debug session click on the Terminate(red square) button or “Ctrl+F2”:


Download MCUXpresso Workspace containing example/demo project and CMSIS library as zip:
- lpc81x_WS.zip – contains project for LPC812 as Target MCU
- lpc111x_WS.zip – contains project for LPC1114/302 as Target MCU
- lpc134x_WS.zip – contains project for LPC1343 as Target MCU
- lpc176x_WS.zip – contains projects for LPC1769 & LPC1768 as Target MCU
The zip files given above contains archive of workspace which includes the individual project and CMSIS library. Just unzip it a suitable location and open the location as workspace in MCUXpresso.
=OR=
You can import the workspace zip as project from the IDE itself from “File->Open Projects from File System…” menu – note that contents of the zip will be imported as project into the existing workspace.
Reference(s), further reading and Resources: